With Love Canvas Panel by Steph

Hi everyone, Steph here today with a canvas panel. This month the design team is collaborating with Creative Embellishments, which has an amazing line of chipboard embellishments. I decided to create a home décor canvas.

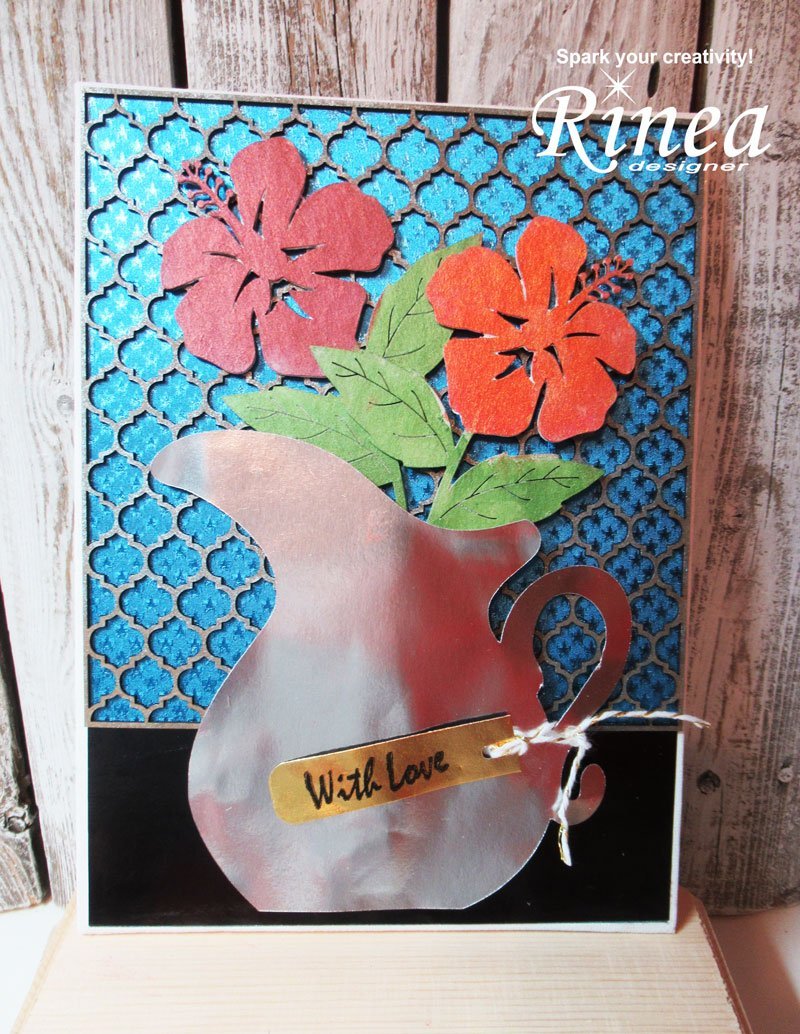
Starting with a 5" x 7" canvas panel, adhere the Sapphire Starstruck to the canvas panel. Add a strip of Ebony/Gold Glossy Foiled Paper along the bottom edge.


Use assorted Brilliance Inks to color the HIbiscus. Since Hibiscus comes in assorted colors, I chose to ink mine in 2 shades of red.

Next, adhere the Hibiscus to the Chicken Wire Chipboard Panel. Foam adhesives were placed behind the top flower for dimension.


Add the jug to the canvas panel over the Hibiscus using foam adhesives for dimension.

Stamp a phrase on a scrap of Gold/Gold Glossy Foiled Paper using StazOn Piano Black Ink and a stamp from Joy Clair. Add twine to one end and tie to the handle of the jug.
Thanks for stopping by.
Steph