How To Make A DIY Clock by Annie

Hello Crafty Friends - Annie here with a fun project using some Rinea Foil Paper and a Clock Kit from Plaid.

Materials Used:
Black Chipboard: 6" X 6"
Memory Box: Honeycomb Background Die
Poppystamps Brand: Little Kindness Stamp Set
Tsukineko/Imagine Crafts: StazOn Ink: Jet Black
Copic Markers: Y13, and B00
Jewels: Butter Yellow
Nuvo Glitter Drops: White Blizzard
Crafter's Edge Crossover II Die-cutting Machine
Let's get started.
I gathered all the supplies I needed for the project.
I die cut the honeycomb from Rinea Foil Paper: Starstruck Gold/Gold then I set it aside.
Next, I covered the Black Chipboard with Rinea Foil Paper: Starstruck Ebony/Ebony (this will be the base of the clock)I then made a hole in the center of the chipboard for the clock mechanism to fit into.


Then, I covered the base of the clock with the honeycomb panel. (I made the center hole on this panel too). I set it aside to dry completely


I stamped the 4 flowers onto Rinea Foil Paper: Starstruck TurquoiseTurquoise using the Poppystamps Little Kindness set, with StazOn Jet Black Ink and the Rinea Clear Round Stamp Block. I then trimmed them out. I also stamped the tiny Bee from the set onto a scrap piece of white cardstock and colored it with Copic markers.


Now, that we have all the components ready let's assemble the clock.

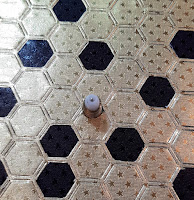
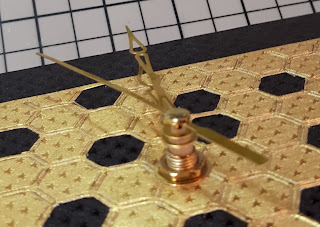
First, insert the clock battery box from behind the clock base through the center hole. Second, slide the washer onto the stem of the clock box. Third, screw on the nut onto the stem. Making sure it is secure and tight the clock base panel.


Fourth, you see the white portion of the stem - you slide the hour hand onto it until you hear it click, Fifth, you repeat this with the minute hand.


Sixth, you snap on the second hand onto the stem - pressing down until you hear it click. *Note: your hand may bend a bit during this process just gently unbend them.


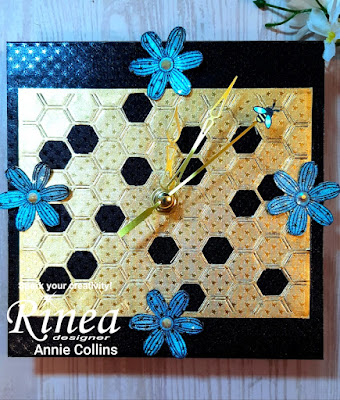
Next, we can decorate the clock with the flowers and bee. I simply placed the flowers at 12 O'Clock, 3 O'Clock, 6 O'Clock, and 9 O'Clock. I adhered the tiny bee to the second hand so he could fly around the clock. As a finishing touch, I added a few jewels to the center of my flowers and a bit of Nuvo Glitter Drops to the bee.


Now, the clock is complete! I hope you give this project a try. You can use any of the wonderful variety of colors Rinea Foil Papers has to offer.
Thank you for stopping by the blog today. I hope you found some inspiration!
Please tag us on social media if you create any project using any of our wonderful Foil Papers!
Don't forget to stop by the shop Rinea.com


