An Adorable Summer Birdcage Home Decoration
by Annie Collins

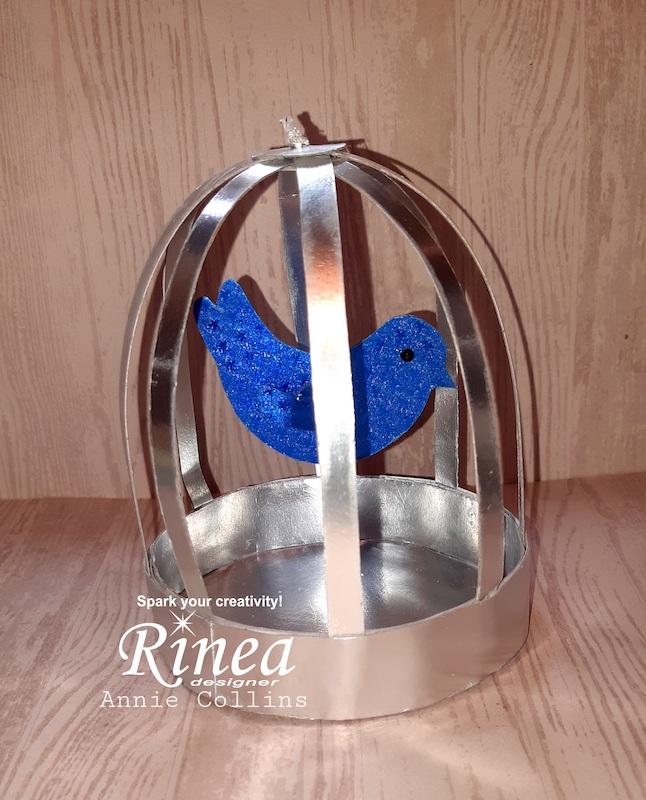
Hello Crafty Friends - Annie here with a fun Bird in its Birdcage decoration.
This a fun project you can make with the kids or just for fun.

Materials Used:
Kaiser Crafts: Black Jewel
Xyron Creative Station Lite: Adhesive
Imagine Crafts: Tear It Tape
Art Glitter Glue
Distress Oxide ink: Hickory Smoke
Distress Oxide Ink: Chipped Sapphire
Recollections Brand 110lb Cardstock: White
String: 2 Inches
Let's get Started
I gathered all the components for the birdcage. I printed the pattern from LittleStuff PDF: Birdcage, Along with Rinea Glossy Silver/Gold Foiled Paper and Rinea Starstruck Cobalt/Cobalt Foiled Paper.
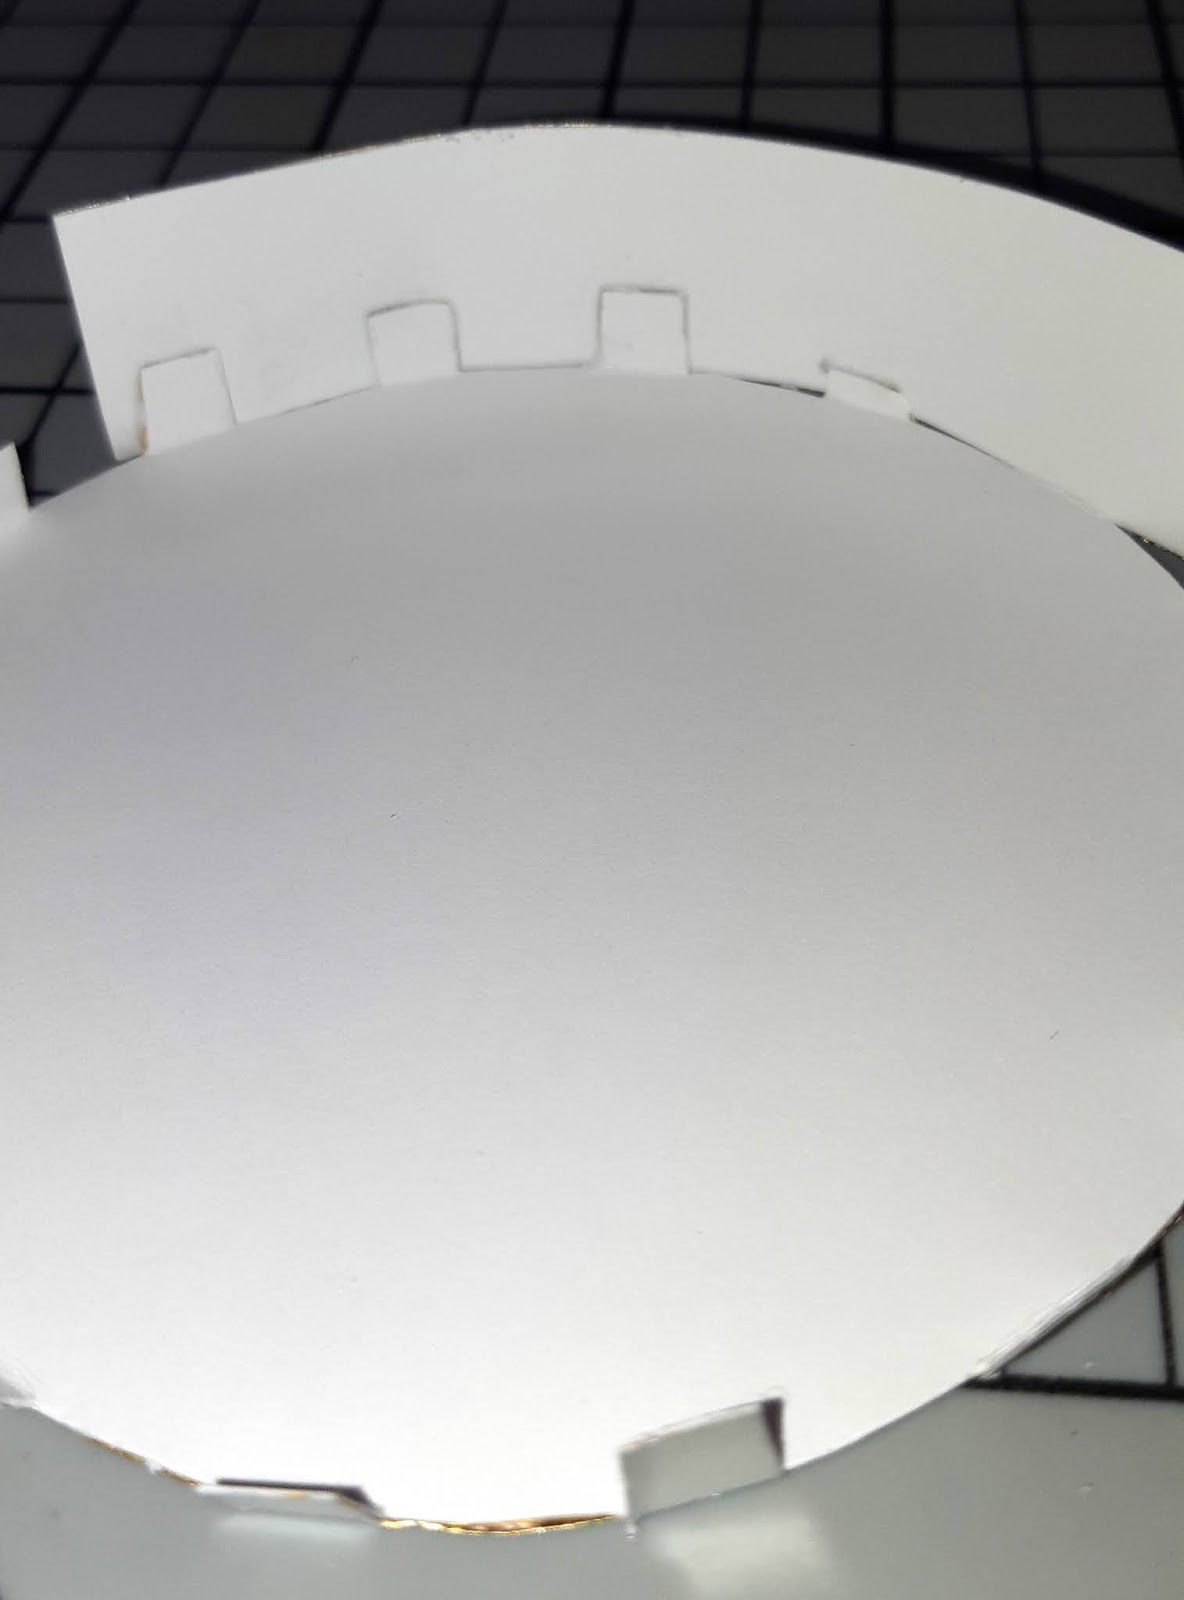
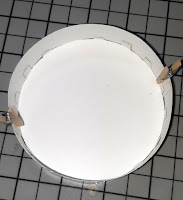
1 Birdcage base, 1 Birdcage inside the base, 2 Birdcage inside liners,
8 Birdcage strips(wires of the cage), 2 small circle tabs, 1 Bird body, and 2 wings.

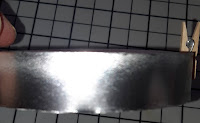
Birdcage: I ran all the cut-up patterns through the Xyron Creative Station and adhered them to the back of the Rinea Glossy Silver/Gold Foiled Paper and trimmed them all out.
 .
. 
Then, I added a bit of Art Glitter Glue to all the small tabs and press the base of the birdcage to the tabs. I repeated this to the other side. I then adhered the side together and used two small clothespins to hold the seems together until they were dry.
Next, I inked all the components of the birdcage with Distress Oxide ink in Hickory Smoke.

Next, I adhered to the inside bottom layer to the cage.

Then, I added the wires to the birdcage base. I put a bit of Imagine Crafts Tear It to one end of the strips and adhered them to the inside of the base. I repeat this with all the wires.


Next, I adhered to the inside liners to the base of the cage to hide the bottom of the wires.

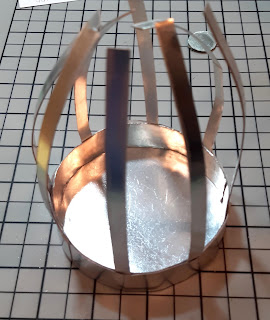
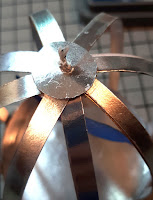
Then, I put some Imagine Crafts Tear It Tape to the 2 small circles. I then place the tops of the wires to one of the circles. I started with 2 then continued to adhere to the rest of the wires. I then adhered to the top circle to make the cage top look finished.


Now, the birdcage is complete. I set it aside while I work on the bird.

The Bird: I ran the bird body and wings through the Xyron Creative Station Lite. Then, I peeled off the adhesive liner and ran it through again. This way the bird was sticky on both sides. I then placed the bird and the wings onto the Rinea Starstruck Cobalt/Cobalt Foiled Paper I then trimmed it out.
Next, I inked the bird body and wings with Distress Oxide Ink: Chipped Sapphire.


Then, I added some Imagine Crafts: Tear It Tape to the wings and adhered them to the body. I curved them a bit for some dimension.


Next, I punched a small hole to the top of the birdcage and to the bird. I then threaded some string through the bird and then through the top of the birdcage. I tided a knot at the top to keep the bird floating in the cage. *optional you can add a small bead for a more finished look.


Now, the Birdcage with a small bird is complete! You can make these for decorations or gifts.

Thank you for stopping by the blog today. I hope you found some inspiration!