Mini Valentine's Day Card and Envelope with Annie

Hello Crafty Friends - Annie here with a quick and easy mini card and envelope perfect for a gift card or two for those special people in your life.
This project features the New Ghost Ink 2.0 and our beautiful Rinea Foil Papers.


Materials Used
Maker's Movement Die Set: Special Delivery
Maker's Movement Die Set: Petite Posies
Maker's Movement Die Set: Stitched Rectangle
Maker's Movement Stamp Set: Notes of Love
Imagine Crafts: Tear It Tape
Scotch 3M Craft Glue
Therm-O-Web Zots: Tiny Dots
Crafter's Edge Crossover II Die Cutting Machine
Recollections Brand 110lb Cardstock: White 3"x4"
Let's get started!
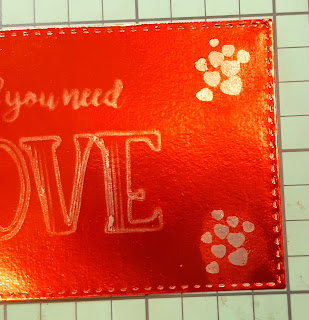
I then stamped the sentiment and tiny heart clusters in each of the corners
with the Rinea Ghost Ink 2.0 onto Rinea Glossy Ruby/Gold Foil Paper which I used a stitched rectangle die to trim just under 3" x 4" so I would have a nice border around the card.

I let the Rinea Ghost Ink 2.0 set for a few seconds then I wipe away the extra ink with a dry tissue.


The more you rub the lighter the sentiment and images become.


I then matted the stamped Rinea Glossy Ruby/Gold Foil Paper onto a piece of 110lb white cardstock that I used the die to cut it measures 3" x 4".

Next, I added some adhesive to the side flaps of the envelope. I then gathered the decoration for the envelope.


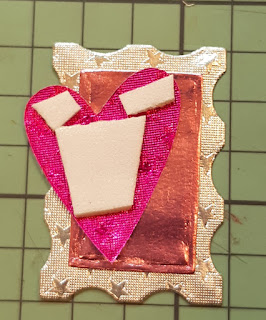
I adhered the Rinea Glossy Blush/Gold Foil Paper onto the
Rinea Starstruck Silver/Silver Foil Paper to create the base of the postage stamp.
Next, I added some foam tape to the back the heart shape which is
cut from the Rinea Starstruck Fuschia/Fuschia Foil Paper and layered it onto the postage stamp.


I then adhered the cancellation lines which I die cut from Rinea Starstruck Silver/Silver Foil Paper to the top right-hand corner of the front of the envelope. Next, I adhered the postage stamp just overlapped the cancellation line on the right-hand corner of the envelope.


I turned the envelope over and remove the adhesive backing and press the bottom half of the envelope onto the sides.


I then turn over the envelope and add the die-cut leaves which
I cut from Rinea Starstruck Jade/Jade Foil Paper to the left side bottom corner.


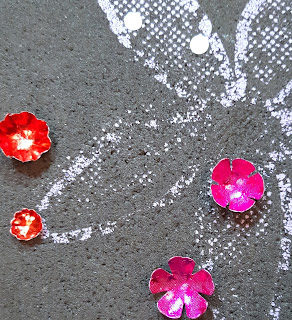
Next, I form the flowers which are cut from Rinea Starstruck Fuschia/Fuschia Foil Paper and Rinea Glossy Ruby/Gold Foil Paper and the centers from Rinea Starstruck Silver/Silver Foil Paper. I gently press the centers of the flowers to curve them and I add a bit of adhesive to the centers and layer the flowers. I add a bit more adhesive tot he center of the flowers and press
the Rinea Starstruck Silver/Silver Foil Paper center into place.


For a finishing touch, I added a few tiny sequin hearts to the heart stamped clusters on the card.

Now the project is complete!
You can write your message on the back of the card and tuck a gift card or two into the envelope along with the card.


Thank you for stopping by the blog today. I hope you found some inspiration!
Please tag us on social media if you create any project using any of our wonderful Foil Papers! Don't forget to stop by the shop Rinea.com

