How To Make Marine Home Decor Project by Monika Graefling-Gladysiak

Hello everyone! I hope you have a wonderful day. It's Monika today creating Marine Home Decor project using Rinea Foiled Papers.

We are going to use Rinea Foiled Paper: Mocha, Gold, Lavender, Violet, Cobalt, Sapphire, Ruby, Arctic, cutting dies from Crafter's Companion: 'Nautical Collection - By The Sea' and 'Nautical Collection - Fancy Shells', black card 12x12 inches, liquid glue, 3D gel glue or hot glue, score board, blue gems, double sided tape and scissors.

Step 1:
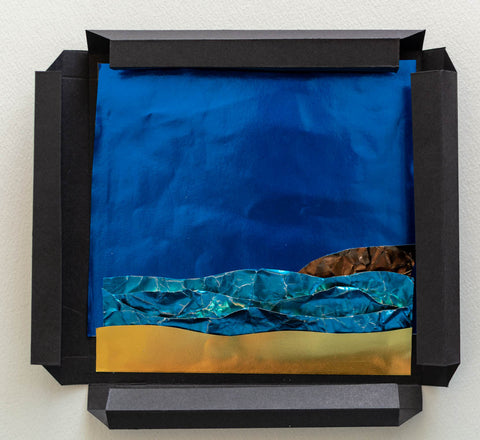
Put the black card and score: 1.5 cm, 3 cm, 4.5 cm, 6 cm and 7.5 cm from each side. Then, look at the corners 5 x 5 small squares, counting from the left, cut 2 squares up, 1 diagonal and 1 up and repeat on the other side. Check the photo below. Then burnish the score lines, but don't stick the frame yet.


Step 2:
Use scissors to cut the sky panel, slightly larger than the inside of the box using Cobalt Rinea foiled paper. Adhere the sky using double sided tape.

Step 3:
Use scissors to cut the waves from Sapphire Rinea foiled paper then scrunch the paper and unfold, use the side of the scissors to 'scrape' the color off the foiled paper. Use scissors to fussy cut the beach sand using Gold Rinea foiled paper.


Step 4:
Die cut all the elements, check the photo below.


Step 5:
Adhere the purple and violet elements on the sail, add the bottom of the boat and the gold shell on the left side. Using Mocha Rinea foiled paper, cut the small hill, scrunch it and unfold to have interesting texture.

Step 6:
Adhere the sea, hill and sand inside the frame, then add all the other elements.


Step 7:
Adhere the sides of the frame using liquid glue or double sided tape.
Using scissors, fussy cut small clouds from Arctic Rinea foiled paper.
Use 3D gel glue or hot glue to adhere the clouds to the project for 3D effect.

Step 8:
Add the gold shell and the star fish in the corners. Use liquid glue to adhere small blue gems.

Step 9:
Optional: you can adhere string at the back and hang your marine home decor project.
It's time to admire your creation now :)
Have a wonderful day and happy crafting!
