How To Make A Fall Standing Photo Frames by Monika Graefling-Gladysiak

Hello everyone! I hope you have a wonderful day. It's Monika today creating a Fall standing Photo Frames using Rinea foiled papers.


We are going to use Rinea foiled papers: Gold Starstruck, Emerald Starstruck, Ruby Starstruck, Marigold, Marigold Starstruck, Copper Starstruck, Mocha Starstruck, leaves cutting dies ( I used 'Scattered Leaves' from Autumn Morning collection by Crafter's Companion, but you can use any leaves cutting dies you have in your stash), any alphabet cutting dies, nesting dies ( I used 'Scalloped Edge Oval 2' by Crafter's Companion, but you can use any nesting dies you have in your stash), acetate, white foam, score board, liquid glue, red liner tape, scissors and a pokey tool.
You can use my 10% off coupon code
Coupon Code CRAFTINGWITHQL
Referral Link:
https://www.rinea.com/?ref=RineaQuillingLady

Step 1
Create your photo bases using white card and score them, check the photo below.


Step 2
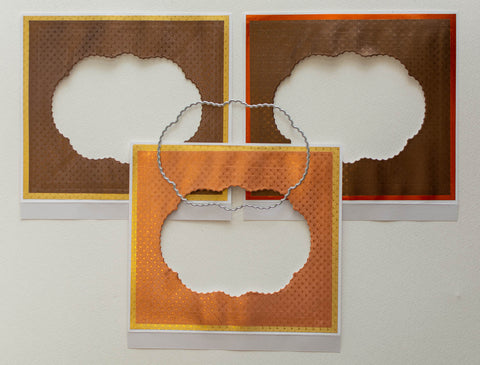
Create the background panels using Rinea foiled papers: Gold Starstruck, Marigold, Copper Starstruck, Mocha Starstruck and adhere them on the front panels using red liner tape.


Step 3
Using the smaller nesting die, put it on the front panel and use low tack tape to create a window and run through your die cutting machine.

Step 4
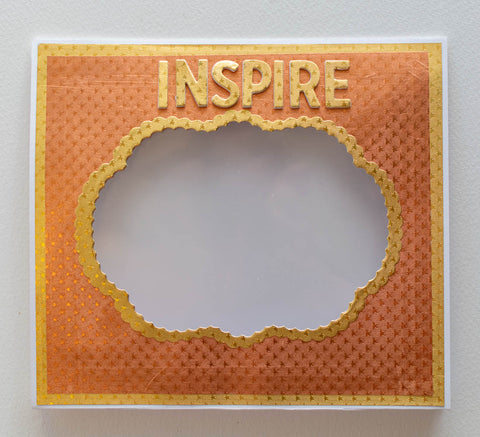
Using the bigger and smaller nesting dies create a frame from Gold Starstruck Rinea foiled paper and then adhere it on the front panels using liquid glue or red liner tape.


Step 5
Create a pocket using acetate. Cut it to 17cm x 27.5 cm then score at 13cm, turn over and score at 1.5 cm, use red liner tape to stick the top and one of the sides. Then, adhere on the back of the front panel.
Now it's time to put the front and back panels together. At the top you have a flap and at the bottom you have a valley, mountain and valley folds, adhere the flaps together.


Step 6
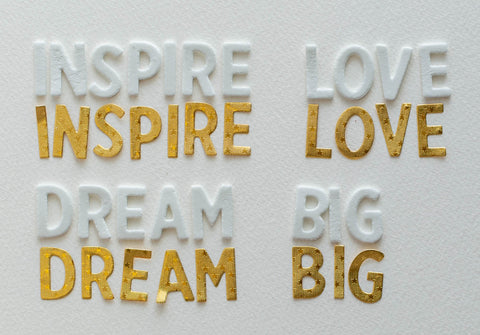
Die cut the letters for your sentiments from foam for extra dimension and Gold Starstruck Rinea paper. Use a liquid glue to adhere the Rinea paper onto foam.


Step 7
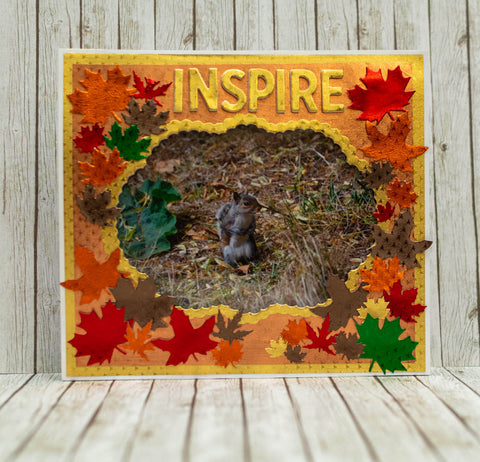
Using Gold Starstruck, Emerald Starstruck, Ruby Starstruck, Marigold Starstruck, Copper Starstruck, Mocha Starstruck die cut small leaves and decorate the front of your photo frames using red liner tape and a pokey tool.


Step 8
Insert any photos that you want inside your frames, they will stand up proudly on your desk or shelf :)


Have a wonderful day and happy crafting!
Don't forget about the coupon code with 10 % off your purchase (details at the top).
