How to DIY A Decorative Victorian Fan by Janet

This is Janet from Try it - Like it - Create it, and I am sharing a tutorial for decorating a Victorian fan.
This month the design team here at Rinea is partnering with Creative Embellishments for our projects.

The fan uses pieces mainly from Rinea, Creative Embellishments, and Little Birdie.

Materials:
- Rinea foiled paper (Gold/Gold Glossy Solid Packs)
- Xacto knife
- hole punch
- glue - mod podge, Best Glue Ever
- Victorian fan pieces - Creative Embellishments
- Flowers - Heleen Purple Passion - Little Birdie
- hot glue
- tassel - various materials
Directions:

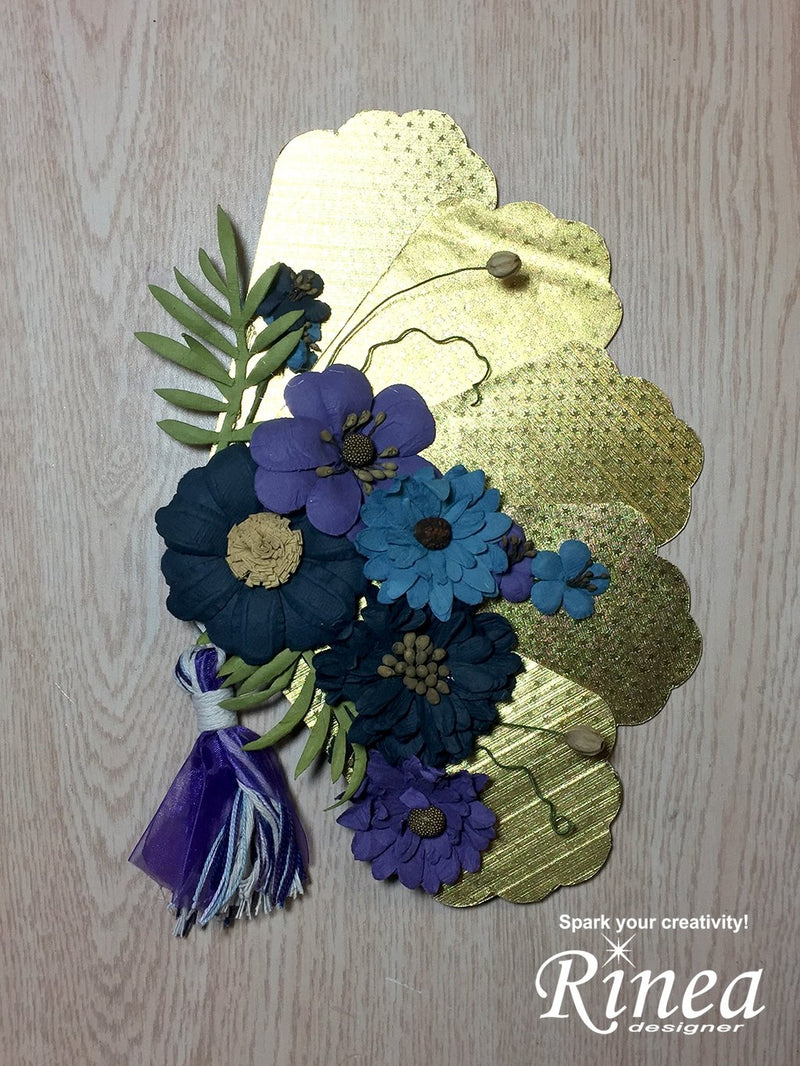
I began by coating each piece of the Victorian fan with the gold Rinea foiled paper in starstruck. I trimmed them out using an X-Acto knife and thankfully a regular hole punch fit the hole perfectly and I punched each one out.

Then I layered them into an open fan shape and glued them together.

I created a tassel by wrapping a variety of color-coordinating materials around my fingers - thread, cord, ribbon... and attached it to the fan through the open hole.

I began layering the floral pieces onto the fan and adhering them with hot glue until finished. The only thing left to do is add a hanging mechanism to the back. (a soda can tab works well for this)
Use the following affiliate linking discount code JANETTRIESCHMAN at Rinea for a 10% off savings.
Use the following affiliate linking discount code JANETTRIESCHMAN at Rinea for a 10% off savings.
I would love for you to visit and follow me
any of the following social media links.