Baby Shower Banner by Steph

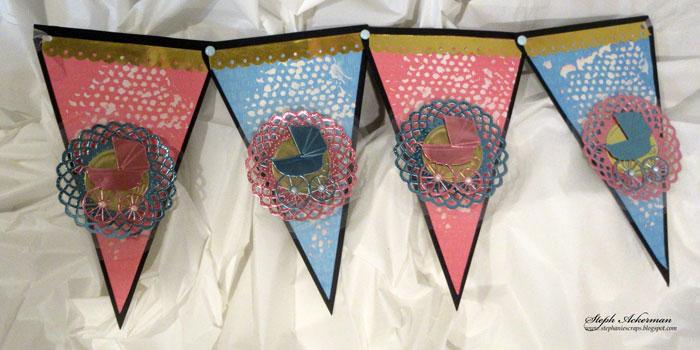

I began by using several dies to cut foils from Blush/Gold Glossy Foiled Paper and Turquoise/Gold Glossy Foiled Papers. The cuts are amazing!

Using leftover scraps from the above die cuts, I added Gold foiled circles to the center of each medallion.

To create the banner pieces, I die cut black cardstock, then die cut pink and blue papers to fit. Once assembled, I used molding paste through a stencil for dimension. Next, I punched strips of Gold/Gold Glossy Foiled Paper to fit the top of each banner.

I adhered tulle to each banner, then added the medallions on top, alternating the colors. Finally, I placed the baby buggies on top with foam adhesives for dimension.
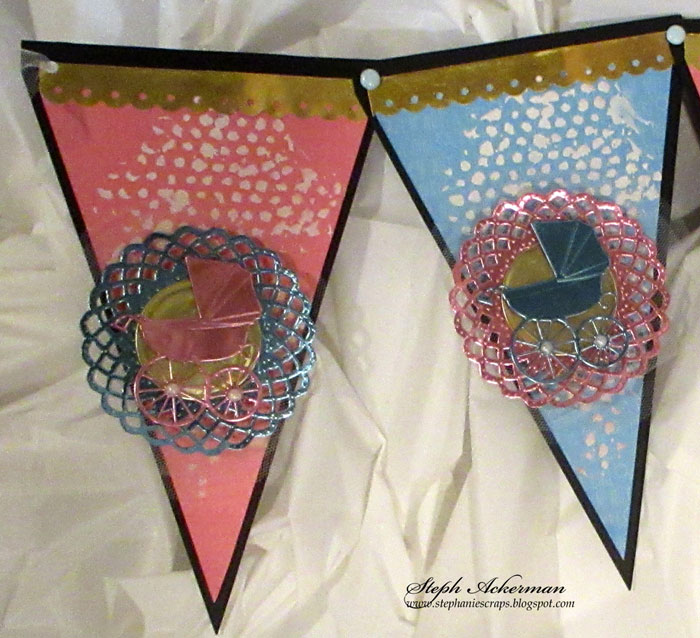
Assemble the banner with brands and add tulle to use as hangers.
Thanks for stopping by.
Steph