Address Book with Rinea Foiled papers

Hi Everyone, Michelle here, ringing in the new year with a new and improved address book! I wanted something bright and colorful to hold all of our friends and family addresses, birthdays and any other special occasions. This project was a great way to use up all my scraps of Rinea Foiled Paper!

To make an address book like this one, you'll need the following:
1. One 2"- 3 ring binder with a front loading window.
2. Rinea Foiled Paper of your choice. I used a combination of Glossy Foiled Paper and Star Struck Foiled paper.


3. Black cardstock cut to size for the front of your binder.
5. Tab punch
6. Border punch
7. Scissors

8. Embossing machine and folders
9. Black Pen.

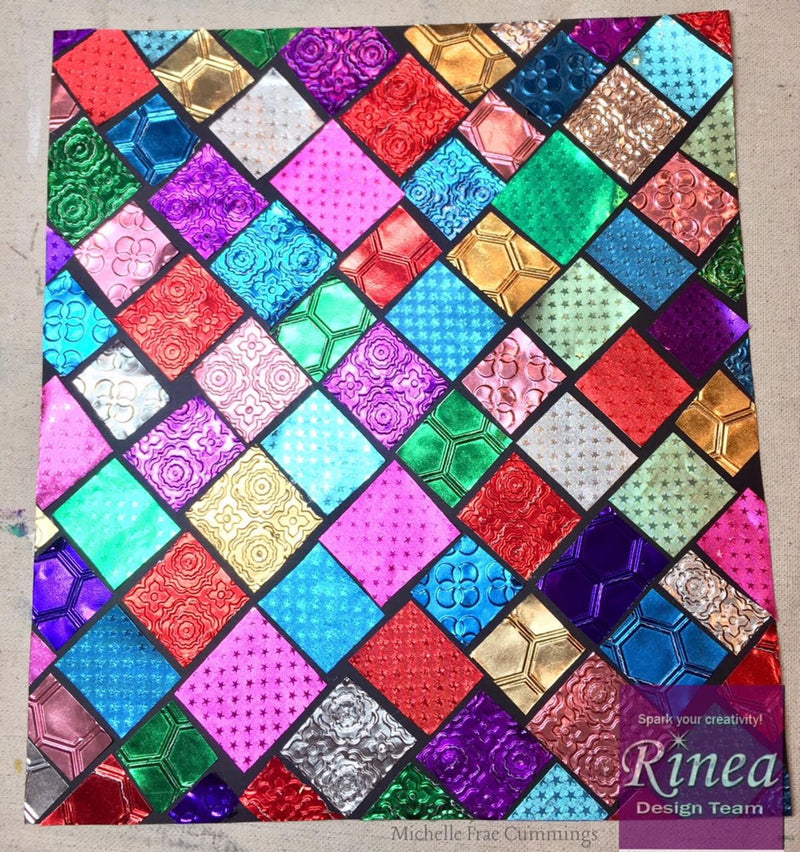
For this project, I only embossed the Glossy Foiled Paper.
I cut all the pieces to be roughly 1" each and adhered each square with the Helmars glue, starting in the center of the cardstock and branching out.

After I was done gluing everything in place, I flipped the decorated cardstock over and trimmed off the extra foil.

I love how the exposed black cardstock creates the look of grout as if this was a high-end mosaic piece of art!

I used the border and tab punch to make page dividers and labeling each with the pen. I adhered them to blank cardstock using the Helmar glue. I added some lined school paper to write all the addresses and info as needed.

Now I have a colorful and efficient address book! So fun!
